Saturday, October 30, 2010

Copying Kathi

Whew, all of my driving duties are done for today. Yay! In between getting one girl where she needed to be and the wait until I had to get the other girl where she needed to be, and then the short time I had before the whole pick up routine began,  I managed to work on a card. The girls had a great time at their events and Amy's team even won their basketball game! (I didn't get to go because I had to pick up Jessica). Steve didn't get pictures because he was asked to keep score today. 16-2 was the final score. Whoohoooo! Makes up for the loss last week. hee, hee.

This card was completely inspired by Kathi's card here. Isn't it gorgeous?! I wanted to try my hand at it. I didn't have the Tim Holtz Antique Linen distressing ink, but I took care of that by stopping by Michaels on the way home from dropping Jessica off. I also completely splurged and bought myself a new EK Success border punch. It's called Chinese Knot and it reminds me of the lattice die you can get from SU.

Kathi, I hope you don't mind my copying your idea! Hope I did it justice...
I didn't have any text paper, or a text stamp, so I used the companion paper to the Silhouette paper pack. Because the punch is wider than the one Kathi used, I opted not to put a sentiment on the front. I also had a scrap of black grosgrain ribbon on my desk from the garland I shared yesterday, so I used it. I used Kathi's idea about keeping the cut paper in the Nestabilities die (I think she saw the idea somewhere) and sponging ink inside the open area of the die(why I wanted needed the Antique Linen ink). I also sponged  it on the swirly paper, to soften the look a bit. I'm really pleased with how it turned out. Oh, you can't tell, but I did pop up the stamped image.

Thanks so much for the inspiration, Kathi!

Thought I'd share a few pictures from the Trunk or Treat last night. 
The girls had a blast. The weather was wonderful and the event was very well attended.
 Waiting in what turned out to be a very long line. Darn that over exposure! Amy's hat was at the mercy of the breeze. I don't "do" their faces up with make-up, though.
 That spooky head in the middle was a guy. His hand was also poked through the table and they put the candy right by it. You didn't know if he was going to grab your hand or not. Jessica nabbed hers successfully, but Amy was hesitant to try, so the helper gave it to her. 
The trunks were pretty well decorated to the hilt. It's neat that the parents and teachers got into it. Some were a little gruesome, but not too over the top.

This trunk was actually a hearse! I probably should have taken a picture of it, but didn't want to hold up the line. I liked this scene on the ground in front of it.

This was the hearse guard? He scared some kids, but thankfully not mine!

Fun bug, full of skeletal stuff. Too bad that main one is facing away, it had red eyes that flashed.

Loved the aliens.

After going through the trunk line, they had a couple of games for the kids to play. Spider toss...you can kind of see Amy's ring, it was red.

Bean bag toss.

Steve met up with Hattie's dad, Duane and they chit chatted for quite awhile. Which meant our kids could go back and try again, and again, and again at the games. They got a little prize whether or not they "won." The prizes got nicer the better they did, I think. Susi was working the event, so I people watched and enjoyed the scene.

Thanks so much for stopping by!
I hope your weekend is going well.
*Ü*
Photobucket

Friday, October 29, 2010

Happy Halloween Garland (?) Banner (?)...Hanging Thingamabob

I'm not sure what "they" call it, but on the crafty type blogs I read, I've seen this idea several times. And at the last minute, I decided I wanted to make one. for Halloween. I know. I'm a glutton for doing stuff last minute. But if you like the idea, maybe you can run with it for Thanksgiving, Christmas or whatever event you are celebrating.  And learn from my boo-boos, so it won't take you as long as it took me. LOL

I'm probably gonna talk too much again, so if you don't want to read it, feel free to just look at the pictures.
 *Ü*

Here's the final project:
From a slightly different angle
 So you can see what I did!
Isn't it fun? I wanted to add more stuff to it, like stickers or bling, but deciding to do this project just a couple of days before Halloween is so not a good idea. Mainly because most of the Halloween stuff is sold out. 
I looked. 

I spent way too much time yesterday hitting stores looking for some Halloween themed paper, like I saw this blogger use. Um, can't find it. anywhere.

Then I was mulling over if I should buy a stack of 12 x 12 paper just for one project. In the end, I decided not to and settled for using stash I had at home. Do you know, I don't own any Halloween themed paper. I don't know why. So, I thought, I'll pull out my CTMH gingham paper and use black cardstock. I DID have the glittery paper, that I used for the letters, whoo hooo.

I then fought with my Cricut for an inordinately long time cutting said letters out and deciding what type of mat I wanted to use. That glittery paper leaves a lot of "dust" on the mat, making other paper less likely to stick well, causing said paper to slip in the middle of the cut, causing just a twinge of frustration. Yeah. Sigh.

I had to quit to go pick up the girls from school. End of creative time yesterday.

This morning, after I spent time at the girls' school for their Harvest Breakfast (the politically correct change for the Halloween party we all grew up with), I decided to stop at  Hobby Lobby, the one store I didn't try yesterday. Their paper is 50% off right now AND they had single sheets of Halloween themed paper. 
Whooo hoooo! Should have thought to go their first, duh.

On a whim I also picked up some purple textured cardstock.
Which meant, my original plan from yesterday was going to be altered.
But, I wasn't going to cut out any different letters. I just cut the Orange gingham instead of using the Autumn Terracotta I was going to use. 

I, all along wanted to try to make the accordion folded rosette, medallion, thingamabob, but didn't have 12 x 12 paper. That is, until this morning.

Here's a video on how to make them that I found this morning. It's a bit long, but I forwarded it to the part I wanted. It's where I got the idea to use the border punch, though. I really liked that touch.

So, I cut more paper, and folded and hot glued (faster than regular glue) and adhered to the ribbon in the center. Um, don't do that. Adhere the ribbon near the top. Otherwise your hard work will flop over from the weight. Ask me how I know. Told you, I'm trying to save you some time here!

In the end, you can't really see the fun paper I used. Oh well, I know it's Halloween paper. LOL

To hang it up, I picked up some of those command hooks and stuck them on the inside edge of the mantle (turned on their side, so that pull thing wouldn't show, you know that piece you pull to remove the hook). 
I tied a loose knot at the ends of the ribbons and hoped I was accurate enough with my guessimating to have it somewhat centered. I didn't measure. My creative time was about done and I wanted to be done at this point. I think I guessed okay, but those perfectionists out there might be cringing.

I used the Storybook (letters) and Mini Monograms (scallop mats, circles) cartridges.
Letters for Happy are slightly smaller, cut at 1 1/4 inches
Halloween letters are 2 inches
Gingham circles are 2 and 2 1/2
Black mats are 2 1/2 and 3 inches
Purple mats are 3 1/2 and 4 inches
Crud, I think the strips for the happy medallions are 1 1/2 and 1 3/4. You need to allow extra for the punching, otherwise figure half of the diameter you want the final piece to be.

I think that's it.
If you've read this far, thank you.
If you have questions, feel free to ask away.

Thanks so much for stopping by!
I hope you have a great start to your weekend. 
The school is hosting Trunk or Treat this evening. Yay for the girls. The weather is gorgeous today.
Tomorrow, Jess has a Girl Scout function and Amy has a birthday party to go to as well as her basketball game. Which means...lots o' driving for mom. hee, hee.

*Ü*
Photobucket

Saturday, October 23, 2010

Super Fun Party

My friend, Susi, sure knows how to throw a party and combine a party with Halloween, one of her very favorite holidays, and you've got the makings of a fabulous time.
The table of goodies set up for the guests.
Only one ghost pop was injured in the transporting from our house to theirs. They sure were a hit. I think I came home with 4. Hee, hee!
Everywhere you look in Susi's house is a treat. I could be there for days and still not find all her treasures.
Love what she did on the top of her hutch.
You think I decorate my house? My attempts are paltry. But, it's partially because of Susi's talent that I even attempt to decorate. She's a fun influence, that's for sure. 
Loved this vintage sign.
Isn't this chalkboard a great idea? It's right next to the front door as you enter/leave the house.
Gotta have creeeeeepy containers! 
To start the party off, we all went outside to howl at the moon, what a fun idea, and don't the kids look great all dressed up?
Initially, Jessica wasn't going to do the creepy containers (and Amy was steadfast in her refusal to do these), but she agreed to poke her hand in one or two.
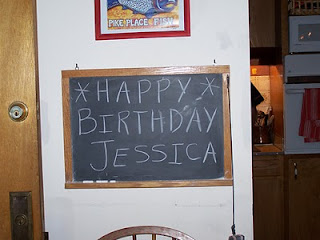
Happy Birthday, Sweetie!
No matter what, kids clamor to see what 'cha got!

Love this shot of our friend Aaron, relaxing a bit with his goodies. 

I did take more photos, but a lot were blurry. The lighting was low and the skills of this photographer are not that great. Tis okay, it was fun night and the memories will last forever!

Thanks for stopping by.
Hope you have a great weekend!
Photobucket

Friday, October 22, 2010

Looking Sorta Spooky...

I've been busy the past couple of days getting some goodies ready for the Halloween/Birthday party tonight. While the girls are doing their daily reading, I thought I'd sit for a few and share what I've been up to.

Here's the completed ensemble.

Mummy cupcakes. I couldn't resist these when I saw them on the Better Homes & Gardens website. I baked the cupcakes yesterday and put them together today.  That's a marshmallow with a couple of slits cut into it, then stuffed with some mini M&Ms. I dusted the top of the cupcake with white sanding sugar. Easy peasy, spooky-ish and fun.

Ghost Cake Pops from Bakerella's book Cake Pops that I picked up a week or so ago. I love it, and am happy I splurged a little on it. The girls have been  poring over the super cute pops and Jessica practically begged me to make these. Today was the day for creating them (there are 36 pops altogether-I ran out of candy coating for the remaining 8 or so),. This is my second attempt at cake pops (I made my first batch over a year ago for Jessica's Daisy meeting) and it went much more smoothly thanks to the tips provided in the book. Not a single Cake Pop slid off the stick this time. Whoohoooo!
The faces were made with edible markers. Cool, huh? They aren't hard to make, but it does take time and a bit of patience.

Yesterday I made these chocolate pretzel rods. Not perfectly, as some excess chocolate went over the edge of the mold,  but still fun.

I ran out of baggies for them, so took this pic so you could better see the shapes that were in the  mold.

And just to keep it real, this is what my sink looks like at the moment.
Guess I'd better get off my tush and clean it up, huh?

Thanks for stopping by!
Hopefully I can get some good photos at the party this evening.

Photobucket

Thursday, October 21, 2010

In The Blink of an Eye...

We went from this...
 to this...
(excuse the bedhead hair)

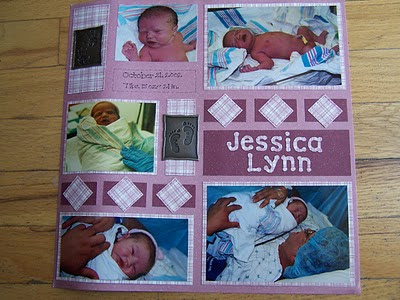
Happy 8th Birthday, Jessica!
And Happy Birthday to my brother, Jim. 
Yep, they share their special day.
*Ü*

We took her to dinner last night as this evening she has Brownies and Amy has her first basketball practice. She even wanted them to sing her happy birthday (last year she kind of freaked out when they did). She told me this year she is older and can handle it. LOL

We will be having her party tomorrow evening in conjunction with our friend Susi's annual Halloween party which will be a ton of fun, if previous parties we've been to are any indication.

Thanks for stopping by!

Photobucket

Tuesday, October 19, 2010

More Fall Stuff...

Just a smidge more...I'm pretty much done now. (I think) LOL

Over the past couple of weeks I've been working on crocheting simple granny squares in a multi-color fall yarn and a medium green yarn for this throw I wanted to drape on the bench you see as you walk into our house. I finished up the project yesterday. Yay! The pictures aren't very good at all as the colors are kind of dark and my camera must not like the darker colors. But I'll share them anyway.


That pumpkin you see is the one Jessica grew this year. Amy's is a bit larger and sitting on the floor for the moment. The pattern I used is from Fave Crafts and I modified the design simply by making fewer squares. I also joined the squares using a slip stitch because I didn't like how the whip stitch looked at all. Granny squares are fun to crochet because the stitches are double crochets and I love the groove I get into doing those. 

I had to post about these cute little teeny tiny pumpkins I found at Michaels a week ago. They came in a cylinder and they are called pods. I've never seen anything like them before and using a 50% off coupon meant I couldn't pass them up. I love how they look in my hurricane (?) lamps.
 There were enough to fill in the mason jar I had in the glass container I keep on the counter (and one other little glass container I have on the book shelf, but you get the idea so I didn't take a picture of that, aren't you glad?
Plus, I get to show what bits I added to my counter this year. Those acrylic gems are pumpkin shape and I found them at the Dollar Tree. I bought two packages. And I was thrilled at how the colored spanish moss filled in the jar with the pumpkins I got last year. I was on the hunt for Brach's butterscotch drops, but haven't found them, so I settled for Walmart's brand. It looks ho-hum, but for a dollar, I can't complain too much, now can I? LOL

Here's a close up of those funky pumpkins. 

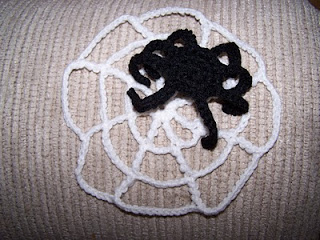
And finally, another nod to Halloween. This I made last night while watching tv.
I left it where I put in on the couch so Jessica would find it this morning. She's been the one who has really clamored for Halloween decorations this year.  She loves it! It's all crochet and the spider needs some googly eyes, but seriously, I had it done in about 20 minutes, give or take.
The patterns is from Lily. I think you have to be a member (free) to get to the patterns though. It was part of a wreath they created, with mini pumpkins and witches...hmmmmmm....

Thanks so much for stopping by and for your wonderful comments about my exploration of tatting. You sure know how to make a gal feel good.

Have a great day!

*Ü*

Photobucket

Friday, October 15, 2010

Have You Ever Tried Tatting?

And I don't mean getting any sort of tattoos. LOL I'm not really a fan of those, to be honest, although I have seen some pretty neat looking ones. No, I mean a craft called tatting. It's very lace-like in appearance. I remember my mom attempting to learn how to tat using a shuttle, but she never did get the hang of it. Those were the days before the internet. I suspect had she ever gotten into using the computer and the internet, she would have utilized all the tutorials you can find and maybe figured it out.

Several months ago, as I was walking through Hobby Lobby by the DMC floss, I noticed the book they sell on learning to tat. I picked one up and was intrigued as there was a method shown called needle tatting. I bought the book and a needle and tried my hand at it. I made a medallion, which I sent in a birthday package to Kathi.

I then got distracted by other projects and didn't really delve much more into tatting until this week. I came across a giveaway post on Poppies at Play the other morning. Normally, I don't pay much attention to giveaway posts, as I don't enter them (at least not very often at all). My reasoning is I don't think it's quite fair to enter and try to win when I don't do giveaways on my own blog. Anyway, I was scrolling through the post and saw a picture of a tatted butterfly. You know me and my thing for butterflies. So, I slowed down and saw a tatted pumpkin! Oh my heavens! Well, it turns out the creator of these cute items has a blog and I clicked over and just loved the 'tatties' that the blogger created as hairpieces for babies! The blogger is Coretta and you can find her terrific blog Corettadeesign, here. She also has an etsy shop that you can find here. And you must look here to see the most adorable owl tattie she created. I left a comment asking her if she had patterns for her designs available. It took awhile for her to respond(she only offers completed tatties), she's a busy mom, I'm sure, so in the meantime, I printed off one of the photos of her pumpkin and tried to recreate it with my limited tatting knowledge. I was able to make one that looked similar. I've gotten her permission to share my tatted pumpkin with you...yay! If you want some of these for yourself...you must head over to her shop and see what she has to offer.
Not too shabby for not having done any thing like this before, huh?

I was also enamored of the flowers she creates and I did a search on tatted flowers. I came across this video on Instructables and followed along, creating this:
How fun!

I'd love to try the owls and of course the butterflies. I want to add them to cards, since there are no girl babies around here anymore. Dang, wish I had known about these back when the girls were teeny...they were of the baldish persuasion for so long and these would have looked so very cute on them! Ahhhh well.

I took this picture to give you an idea on the size. Mine are larger than Coretta's, but that is perfectly fine with me. 

Nope, I won't be making these to sell (cuz you know I don't sell what I make anyway, as much as you ask me to do so), nor will I go into how they are made-needle tatting is pretty straightforward, I think, and you can do a search for the how-to-or watch the video I linked above, she does a great job showing how to make that flower. Coretta's worked hard on her designs and was gracious to let me share her ideas with you. Thanks so much, Coretta, if you read this post.

This is the reason I didn't get the Polly pumpkin done, I was distracted by wanting to tat. LOL I think I am highly distract-able when it comes to crafting!

Thanks for stopping by!
Hope you have a great weekend!
Photobucket

Polly Want A Pumpkin?

Well, I didn't get the project done as quickly as I'd hoped, but after listening to Jessica ask me for 1,000th time if I was done yet, I am happy to report, that yes, the latest crochet project is completed. Yay!

I had to pry it away from a couple of girls who have been playing with it non stop (nope, not making two) since the final stitch was made last evening. Yes, she even watched over the bathing of said girls...(TMI, I know, but seriously these girls have been gaga over it, much  more so than I thought they would be.)

So, here you go...Polly in a Pumpkin (or maybe Polly is part of a Pumpkin?)

Kind of like those doll cakes you see with the Barbie stuck in the middle of a dome cake, only a lot smaller and a lot less messy!

The pattern for this came through my inbox from Fave Crafts. Should you desire to create one for your little darling(s) the pattern can be found here.

 Thanks for stopping by!
Hope you have a fabulous Friday.

Photobucket