Showing posts with label Paper Smooches. Show all posts

Monday, September 19, 2016

Sharing a card and a bit of an update!

Hi There!
Long time no see. Oh my gosh, I'm sorry I've been absent for so long. My life has been a real whirlwind since mid-August. School started and we were short staffed in the kitchen. My assistant manager got a new job outside the school district. Yay for her, but not so much for us. My other co-worker was out for the first couple of weeks as she needed more time to recover from foot surgery she had right after school got out last May. We've had a couple of different people come in to fill spots temporarily until a new assistant manager could come in. I was going in early to help with breakfast, too. Busy times! We have our new assistant manager now and while she's a trainee, she's doing a good job. I think she'll be a good fit for our kitchen. Whew.
My dad arrived for a two week visit a couple of weeks after school started. Yay! That was fun and a bit hectic as well. He did get to attend Amy's first football game of the season and enjoyed listening to her band play. 

Back to school means back to Bingo and this next weekend competition season starts.

Amy's had more homework so far this year and a lot of it requires her to use the computer, so I've been bumped off quite a bit, too. No biggie, but it eats into posting time. 

Jessica has had a quieter start to the year, but is, as I type this, she's working on a 3-D rollercoaster project that demonstrates Newton's Laws of Motion. She has a classmate partner working with her. They are using tubing and dowels and other supplies to create a roller coaster that will hopefully allow a silver marble run the entire track. There's a loop involved! Fingers crossed it works the way it's supposed to when they get done. 

On Friday our family went to Elitch Gardens (our amusement park) for Employee Day through my husband's job. We had a good time. However, the evening was cut a little short due to a thunderstorm that passed over us. (The forecast was isolated showers...guess we know where they were isolated to). I got pinged on the top of my head with a pea sized (well a little larger than pea sized) hail stone. Those puppies hurt!
I thought I'd share a few photos

The girls on the gondola ferris wheel. 


The sunset was really pretty when we were at the top of the ferris wheel. 
Here we are waiting in line for the Twister roller coaster. We never did get on the ride as the storm was approaching with lightning and thunder causing the ride to be stopped until it passed. Being it was close to the end of the night, we just left. 

And finally...I have a card to share! Believe it or not, I started this card early last month and only got the critters stamped and colored, as well as the heat embossing. Then it sat until last weekend when I snuck in a few minutes to try to finish this past weekend. The design is a case from Tara Sell's card, but darn it, I cannot find it on her blog. I also looked on her You Tube channel and no luck. Sorry! Anyway, I pretty much cased it completely. I think the changes are that I colored with pencils and I added the thanks to a banner. I also used different Doodlebug paper. 
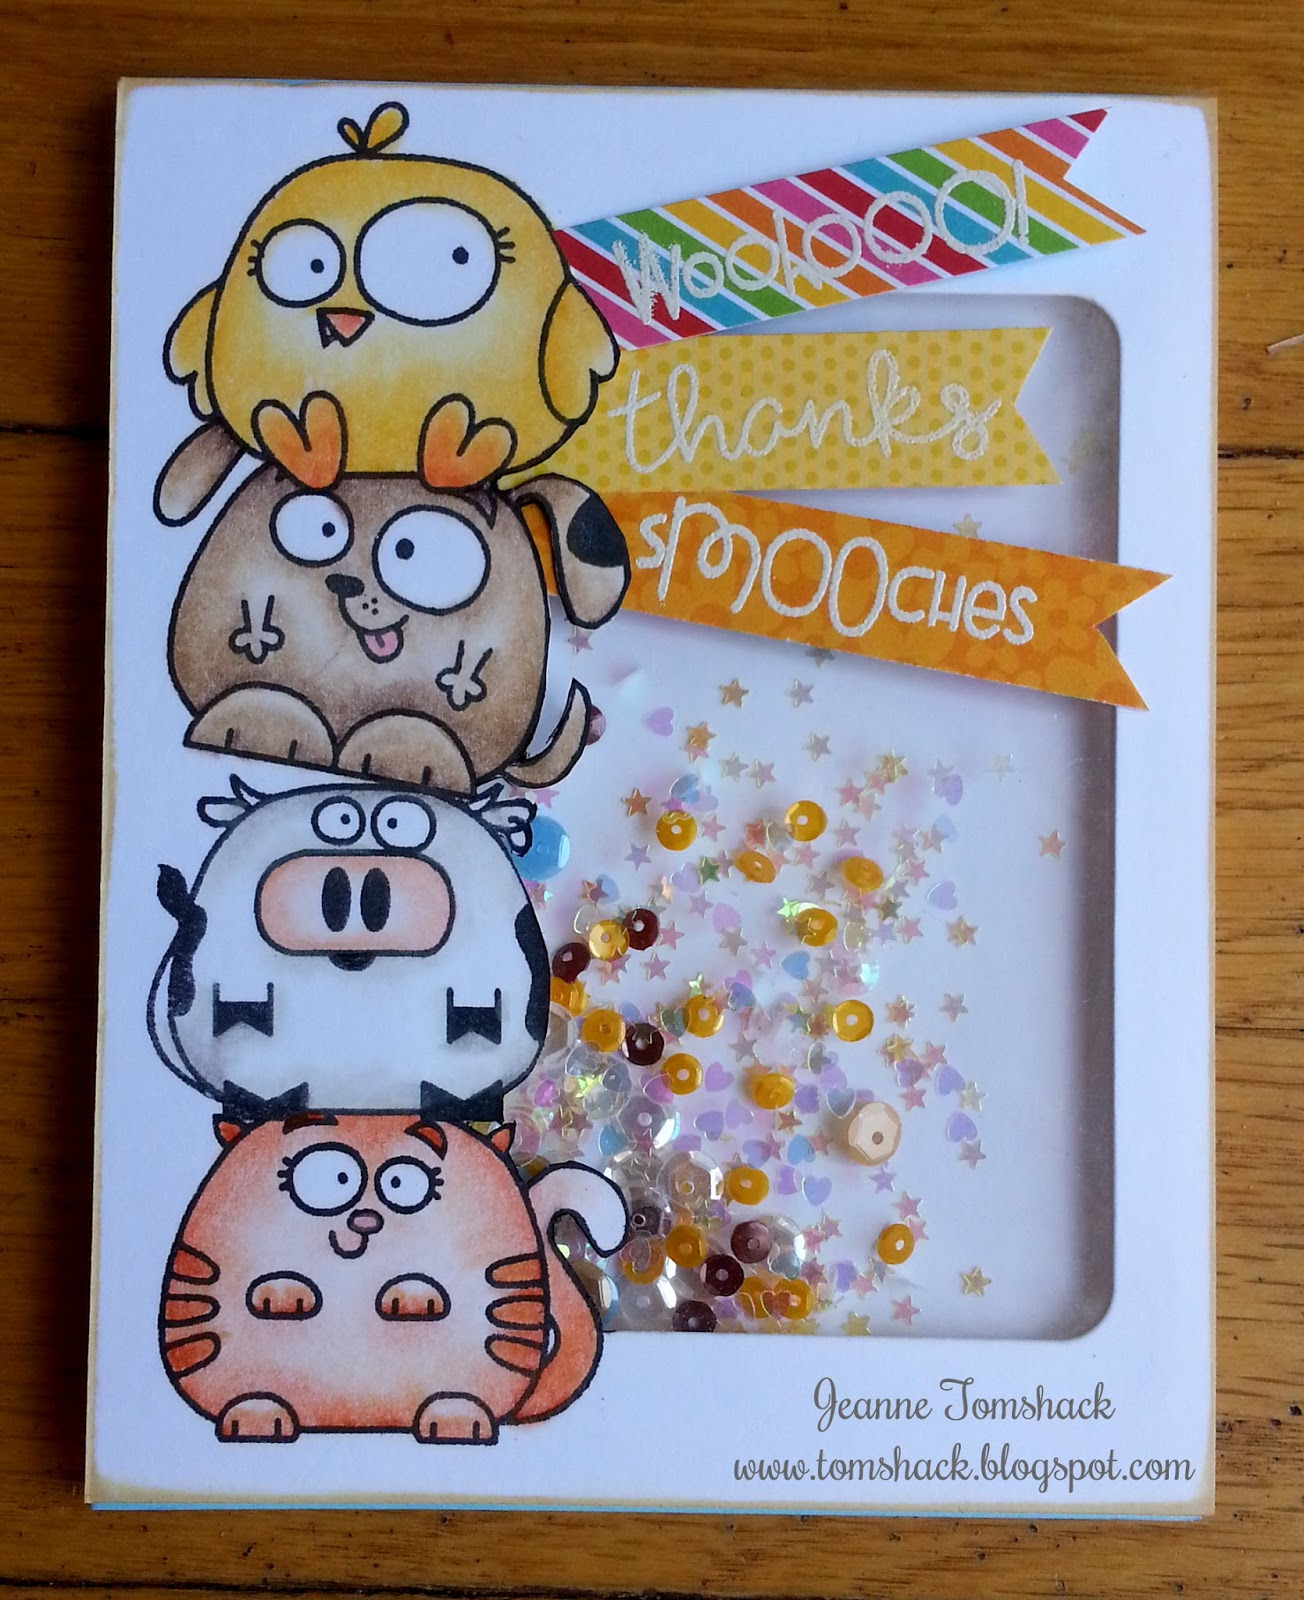

Whew, that's it from me for now. 
Hopefully I will be able to craft again sometime soon.
Thanks for stopping by. I do so appreciate the visit.
Hope your week is off to a good start.
Hugs,
Jeanne


Friday, August 5, 2016

Needed Some Cards...

Hi there!

Well, I wish I made some cards just for fun, but unfortunately, I found myself in need of sympathy cards. My lifelong friend's father passed away. He and his wife had been married for 54 years! What a remarkable achievement. He had a good life, but is gone too soon. 

I was inspired to make this card from one made by Kay Miller

The following card might be a little bright, but I feel it still fits. I cased this one on Clips-n-Cuts 


I actually made a third one, but I neglected to take a picture of it! Darn. 

It looked a lot like this one. :)

I also made this birthday card. I saw this design somewhere, but cannot find it right now. 


My girls and I actually went to California to attend the funeral. It was the very first time my girls had been there and the first time I'd been back "home" in fifteen years. We spent a long weekend. My dad was thrilled (well, except for the reason we went). The service was lovely and a wonderful tribute to a wonderful man. 
The highlight of the trip was going to the beach. There was no way we were going to be in CA and not go to the beach. My mom took us kids every Wednesday during summer break when I was growing up. She would drive us through Topanga Canyon, for those of you who might know that route. We used to go to Santa Monica beach, but it's gotten to be such a tourist area, my brother thought it'd be more fun(less crowded) to head to Zuma beach. He was right. We did drive home on Topanga Canyon, though. :) 

And look! We saw dolphins! (I asked the lifeguard to be absolutely certain). I've never seen dolphins when at the beach. There were about 6 of them swimming along the shoreline. They'd move out of our sight line and then they came back. I was thrilled to capture them in photos. So cool!

Thanks so much for stopping by.
I truly appreciate the visit. 
I hope you are having a good day.
The Opening Ceremonies for the Olympics are tonight. Are you going to watch?
Hugs,
Jeanne


Wednesday, January 27, 2016

Wintery Thanks and Snowpeople, too!


 Hi there!

Oh golly, it's hard to believe we are at the end of January, 2016! Happy New Year just a tad bit late. I hope it's treating you well so far. Life hasn't slowed down much since our Winter Break ended. From time to time I've managed to get a card or two made, but my computer is giving me fits these days and getting them edited has been problematic. Sometimes just navigating the internet has been an issue as well. I had some time today and edited them all at one time. I hope I don't have any problems posting this. We've tried a couple of fixes, but the issue remains so obviously those weren't actually fixes. Sigh. Gotta love technology.

Anyway, onto the cards. They are copies of cards that I have seen in blogland and liked. I've added my own little tweaks.

Here's the card I copied. (sorry it's so dark, I tried my best to lighten it up)
My tweaks: colored with colored pencils and the pattern paper. I sent this is in the mail and could hear the beads shaking. Wasn't sure if the post office would get all worried at the noise, but it got to the recipient, so all is good. :)

Here's the card that inspired these two cards.

My tweak: I used glitter paper from DCWV. The snowflakes and thanks die-cut are sparkly even if you can't tell in the photos. I softened the stripes big time on the top card. The second one, I was playing around with the color combo for a different card, but I didn't like the end result for that card, so I used it here and felt it worked really well. 

The new year has been pretty good to us. I never mentioned it here on the blog, but my husband got laid off from his job way back in April of last year. Anyway, after all these months, he recently  accepted a job offer. Yay! While he hasn't started just yet, he should be back to work soon.  The girls are as busy as ever. Amy's Winterguard had an evaluation performance last weekend. They got positive and encouraging comments from the judges on their show so far. We also worked Bingo last weekend. Jessica has been busy with clubs and is going to a dinner theater tonight with one of them. This week has been filled with Girl Scout meetings as well. It's always something. This mom is doing her best to keep up! 
:)

That's a very brief update on us. I thank you very much for continuing to stop by from time to time. 
I so appreciate the visit! 

See you again soon!
Hugs.
Photobucket

Tuesday, August 11, 2015

Best Buds~Thanks a Lot

Hello friends!

I'm back with another card using Paper Smooches Best Buds stamp set. Eek! 

I had an idea of a card I wanted to create that used the banner image in the set. Terrific cardmakers have been using those single word dies to span a die cut circle and I think that looks really neat. So I thought I'd try my hand at it using the banner image. I thought I'd die cut a circle out of the top of the card and use a negative space of the die cut to act as a stencil and I would blend some colors like Kay Miller or Laura Bassen does. That was the look I was going for. But not what I ended up with!

So I start by taking a few attempts to die cut the circle on the main panel of my card, because, you know, the die kept shifting and going off center. My tape wasn't strong enough. Got that right. Okay, so I start blending using a negative space circle. I got a couple of hard lines, even though I thought I was being super careful, but liked the look by the time I was done. Picked up the stencil and realized that the "stencil" didn't cover the whole inside of the card and....I got ink on the inside panel of the card. Grr again. So, I start over and messed up the blending a.gain. Oy! I had a mini hissy fit and just about threw it all into the garbage can. But I took a couple of deep breaths and changed my plan. 

Instead of  doing the blended ink circle on the inside panel of the card, I used the same size panel and attached it with foam tape to the top piece with the die cut circle. Okay, I'm sure that doesn't make any sense. 

Here's the card I ended up with:


Originally, my idea was to have that blue inked circle be what you see on the inside when you open up the card. Now it's attached with foam tape to that embossed panel and when you open up the card you have the full white panel to write your note or stamp your sentiment. Would you believe that when I attached the embossed piece that was covered with foam tape to the card base, I did it crooked? Oh my gosh, it was just about the last straw for me today. But I carefully cut it off the card base and attached it to a new one. 


I took a close up of the circle because I liked what I decided to do here. I used my clear Wink of Stella pen and covered the blue inked circle. I love how sparkly it is! Then I added some Stickles to the center of the flowers and used a Gelly Stardust pen on the leaves. I also added some foam under the banner to help keep it from bending in the open space behind it. 

That embossing folder is a Darice brand and I colored the images with pencils and blended with odorless mineral spirits. 

Thanks so much for stopping by! 
I so appreciate the visit!


Photobucket

Best Buds Surprise!

Hi Friends!

I got a huge surprise last week when my sweet friend,  Ms C left me a comment telling me that I had won a prize from Paper Smooches(for a comment I left on my massively talented friend, Kay Miller's, blog). I was absolutely giddy. I knew for sure which stamp set I wanted to order, Best Buds. I also was able to select a few dies. Squeal! Shipping was super fast, too! Thanks, Ms. C, Kay, and Paper Smooches!!

I sat down and stamped several of the images onto white cardstock (Michaels Recollections 110lb white). I knew for sure the first image I was going to color was the one with the flowers in the jar. I used my trusty colored pencils and odorless mineral spirits and got to work. 
I kept it simple and straightforward. Then I added some Wink of Stella as well as a little bit of Gelly Stardust pen. I also tried some white dots from my Signo pen, but I think that might be drying out or gooping up from lack of use. :( I ran the cardstock through my Cuttlebug with a Lawn Fawn stitched rectangle and adhered that to a piece of textured black cardstock from Hobby Lobby. Finally, I add a few iridescent sequins (also from Hobby Lobby). 

By the time I finished futzing with this one, my crafty time was up. But oh, I was smiling big time when I was done. 

Thanks so much for stopping by! I hope you are having a wonderful day. 
Big hugs!
Photobucket

Sunday, June 7, 2015

Sidekicks and Shakers

 Hello Friends!
I'm back to share a couple of cards. Yippee!
Both of them are shakers. So fun!

The first one is a case of one I saw here on the Lawn Fawn blog. I had a sidekick who wanted to help. She hadn't done a shaker before so it was fun showing that technique. She tried and tried to get the sentiment stamped just so, but in the end I stamped it. We had to do two lines as the sentiment was too long to fit across the stitched rectangle. I came thisclose to snipping the stamp apart, but my sidekick didn't want me to do that. She did all the coloring of the image (with my pencils and blending with odorless mineral spirits). Then she added some Stickles for some extra sparkle. I had her use a paintbrush to paint on the Stickles, so it wouldn't look too globby. 

I love the look of using sequins, but I haven't jumped on  ordering them from Pretty Pink Posh yet.  I don't know which colors would be best to get. These we picked up at the craft store. Oh and I showed Jess some beads I had and she decided we needed to use some. :) 
Training her up right, aren't I? LOL
We did this card in shifts and just put the finishing touches on it today. I think she did a great job!

She decided she was done for today, so I pulled out this Paper Smooches set I picked up in early May when my local scrapbook store had a sale. Had to take advantage, right? Anyway, I was inspired by this card by Mellymoo and wondered what it would look like as a shaker. 


Not too shabby, huh? I added some iridescent sequins and some tiny microbeads I've had in my stash for practically forever. Those microbeads were a last minute thought and had I planned it better, they wouldn't cover up the crab so much. I figured maybe it is okay, because crabs don't want to get caught and he could be hiding a bit. Shrugs. Works for me anyway.
These are colored with pencils and blended with odorless mineral spirits. 

And with that, I've sort of participated in the second Coloring Challenge that is going on this month. Thanks, for inspiring me to do it, Barb. Barb is an enthusiastic participant and shares what she colors on her blog. It encouraged me to get something colored, anyway. Yay! You don't have to complete a card, but I managed to this time. 

That's it from me today. 
Thanks ever so much for stopping by. 
I hope you are having a great day.
Hugs,
Jeanne


Friday, March 7, 2014

Scooting By to Say Hi

The latest newsletter for Paper Smooches hit my inbox yesterday morning and I was instantly smitten with a card created by Emily Leiphart. It used a scooter from Spiffy Scooters and a couple of super cute critters. I went shopping with my friend, Becky, yesterday and picked up the scooter stamp set just so I could make this card! Well, no, I've had my eye on this set for a while, but this card pushed me over to the "must have it now" side. I am so glad I was able to create this card! I came out just as cute as I'd hoped. 
This is the card that inspired me.

Here's my version.

I used colored pencils and odorless mineral spirits to color the images. Paper Smooches now carries a die to cut out the scooter image, but I don't own it, so all of the images are fussy cut. you can also see my very first real attempt to sponge clouds using a mask. I stamped the cloud image in the Spiffy Scooters set, cut it out and used it as a mask for sponging Tumbled Glass Distress Ink on the background. I used foam dots to pop up the images to give them some dimension. The "road" was eyeballed and cut. And while you probably can't tell at all in the photo, I did use my Wink of Stella clear glitter ink marker to add a little sparkle to the head lights on the scooter. 

I have to say this card got a thumbs up and oh how cute from Jessica when I showed it to her after we got home from school. Yay!

Thanks for stopping by!
Have a happy day.
Jeanne
*Ü*

Saturday, December 7, 2013

Hexagon Christmas Tree

When I saw this card I just loved the idea of using hexagon shapes to make a tree. I thought it would be super fun to use Doodlebug paper, too. I have to admit it took a little arranging and rearranging to get them lined up in a pleasing way.  Edited to add a direct link to specific card
*Ü*
I've not jumped on board the sequin bandwagon really. I like the look but am not sure it's for me. I found these neat looking flat sequins at Hobby Lobby and thought I'd give them a try. The package was 75 cents on sale...not a huge out of pocket expense to try it. I picked them up with the goober stick (not the official name) from Lifestyle Crafts and it left a residue. Sigh. 

Sentiment is from Paper Smooches Christmas Sampler. Also used Doodlebug Twine for the bow.


Thanks so much for stopping by.
Hope you have a happy day!
Photobucket

Friday, December 6, 2013

Colorful Trees

I saw this idea on the web somewhere, but didn't note or save where. I've been trying to find the inspiration link for a few days and I'm just not having any luck. I want to say it was Jennifer McGuire, but I can't find it on her blog. If you've seen this idea, send me the link and I'll give proper credit.

It's super easy really. You stamp your image(Warm Hearts, Paper Smooches), color it in with markers (I chose Sharpies), then cover the trees with Liquid Glass (CTMH) or Glossy Accents. My Liquid Glass had some bubbles in it, so it's not quite as smooth as I had hoped. Then I decided to use a technique I've seen my friend, Alanna, use to add score lines. I like how it set off the trees. Add your sentiment (Merry & Bright, CTMH) and you are good to go. 
Not my usual style, but fun nonetheless.

Thanks for stopping by!
I hope you have a great start to your weekend. 
Stay warm!
Photobucket

Sunday, November 3, 2013

Season's Greetings Snowflakes

I was completely smitten with this card I saw on Pinterest and was excited to try my hand at recreating it using my own stamps and inks. I'm thrilled with the end result. I liked revisiting a neat stamping technique.
 The two larger snowflakes are from a new stamp set from CTMH. The set comes with a cardmaking kit shown on page 69 of the idea book. The smallest one comes from an old CTMH set. I punched circles out of cardstock and after embossing the snowflakes, rubbed ink over the snowflake using a sponge. Very fun.
The ink colors are retired from CTMH, Bubblegum, Clover Meadow, Holiday Red, Orange, Sunny Yellow. The sentiment is from Paper Smooches Christmas Sampler sentiment set.  This would be fun to try again.

Edited to add: I didn't explain the procedure on how to create the snowflakes very well as I didn't want to repeat what the poster said in the blog I linked. But to clarify, I punched circles out of a separate sheet of cardstock. I laid an open circle over a snowflake, inked a sponge and rubbed it over the opening/snowflake to get the circle of color. You can easily overlap the colors as well. Hope that helps in understanding the technique.

Thanks ever so much for stopping by.
Hope you have a terrific day!

Photobucket

Saturday, October 12, 2013

Dotty Trees and Paper Smooches

Yesterday I tried using the tree stamp from Paper Smooches' Warm Hearts set to create a look inspired by this card created by Jennifer McGuire. I'd love to have that stencil, but until I pull the trigger and order it, I am trying to figure out how to get the same type of look on my own. My first attempt yesterday ended up in the garbage can. I decided to try again this afternoon. If at first you don't succeed and all that. My friend Kay's inspiration helped as well. Thanks again, Kay! I'm happier with my second attempt and maybe you will like it as well.

To create the look, I stamped the trees onto a piece of scrap cardstock. You could probably use a glossy cardstock, but I didn't have any close by. I used a craft knife to cut out the insides of the trees and used the image with the cutout openings as a stencil. I used four green inks. CTMH's Garden Green, Olive, New England Ivy and Ponderosa Pine. The dot stamps are from Papertrey Ink sets, Polka Dot Basics and Floral Frenzy. I decided to go ahead and stamp the tree image over the dots so that there was more line definition. I went back and restamped some of the dots to hide any missed spots. Then I used some colored pencils to fill in the tree trunks. I outlined the entire image with a Grey Copic Marker (I have just a few for this purpose). I used a snowflake stamp from Warm Hearts(and CTMH's Heavenly Blue ink) and added a glittery dot to the center. To fill in a little better I added some dot trios. Again, I drew a glittery line to anchor the trees.

That's it from me today. Thanks so much for stopping by. *Ü*
Photobucket

Doodlebug Trees

I have recently become a big fan of Paper Smooches stamps. They are adorable and just my style. It doesn't hurt that Archiver's recently started carrying some of their stamps and I've discovered a new scrapbook store that carries many of the sets. I recently picked up Warm Hearts and had kind of drawn a blank as to what to do with all the cute images. My friend Kay gave me some inspiration today and I put my own twist on her idea. Thanks, Kay! Hope you like what I came up with.
I used the tree stamp in Warm Hearts and paper pieced them with some some fun Halloween Doodlebug paper. I added a bit of sparkle with a stardust pen. I drew a line with the same pen to anchor the trees. The stars got some sparkle too. I realized today, after a thorough search of my stamps, that I don't own any cute "happy halloween" sentiments. So, I resorted to an old CTMH Seasonal Thoughts stamp set. A bow with Doodlebug twine completed the look. 

Thanks for stopping by. Hope you are having a happy day!
Photobucket