When you are in need of a quick, but pretty card, this is the way to go! I saw this card on Creations by AR, it reminded me of the tutorial she posted earlier that I had wanted to try.
Steve's brother and his wife are brand new first time parents of a baby boy named Dallas Douglas (the new mommy is a huge fan of the Dallas Cowboys). Steve wanted to send them a little something. I thought a gift card would be nice so they can choose what they need. They live in South Dakota, so we have no idea what all they've accumulated for a baby. I told Steve I'd make a card and decided to use the technique for the card I linked above.
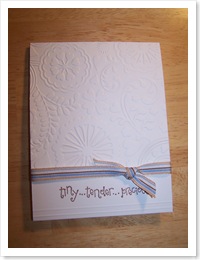
Here's the result:
 Granted, it's not a typical "baby" card, but I like it. I don't have many baby stamps. I did use a CTMH sentiment from a retired set with the same name as the sentiment. The ribbon is American Crafts. It was part of one of those sets of 5-6 you can buy. I liked that the card could be made for a girl or boy depending on the ribbon you used. Anyway, it's ready to get mailed out tomorrow.
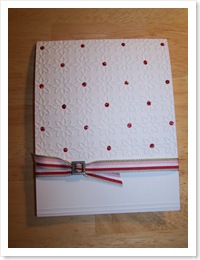
I liked the technique so much I decided to make another one, using a different embossing folder and one that has a girly feel.
feel.
The ribbon is again from an American Crafts set I had in my stash. I've taken it out of its packaging, so I don't know the actual names of the set(s). Sorry about that. To add bling, I used Stickles in the centers of alternate flowers. I thought about adding pink Stickles in the other ones, but thought it might be too much.
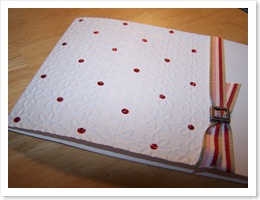
Here's another view of the card.  I just realized an animal hair showed up. It's a wayward hair and not stuck to the card. LOL I liked how the ribbon looks with the blingy slide in my inspiration card, and I remembered I had some from Making Memories in my stash so I attempted to add it to my card as well. I like it even if it's not sparkly!
I didn't look back at how she embossed the card, so I had to take some time to try to figure it out. I ended up realizing I had to turn the folder and just looked at her tutorial to confirm that is indeed how it needs to be done. So, if you want to know how to do the partial embossing...check out her tutorial, which I've linked again, just in case you don't want to scroll back up. Ü
I feel I was pretty productive today in getting cards made. I also worked a bit more on organizing my little corner. I've brought in a shelf that fits my clear stamps fairly well and another bookshelf. I think that's all that will be allowed so as not to overwhelm the room. And good for me, I cleaned up the space when I was done for the day so it's nice and neat for the next time I wander over there.
Thanks again for stopping by! Hope you have a great start to your week.
Jeanne

8 comments:
Hey Jeanne these are great. I love the elegant simplicity of them. I just may have to make a few myslef! *Ü*
Oops. I should have proofed my last comment before I posted it. I spelled "myself" wrong. LOL! Sorry about that. *Ü*
I love these cards and still think the Cuttlebug was the best invention ever. I don't have that Daisy embossing folder but just might "need" it. The Stickles really worked out well. I was sure they were little stones at first. Pretty!!
These are awesome! I am going to have to try this. This will be a great way to use a lot of ribbon I have that doesn't match my paper colors. TFS!
What great cards! I'm going to have to look at the tutorial and try the partial embossing before my mom gets here in November. You know her, always wanting to learn new things when she's visiting!
Jeanne, you're so good. So good. Did I say you're good? Because you really are good.
Man, LOVE your stuff.
boy these cards are amazing! You are certainly talented! Btw., I just finally figured out what the darn U with the dots stands for. I thought that maybe you knew some german (you have to forgive this german lady for looking at umlauts as umlauts, LOL) It just cracked me up when I finally realized what it was!
Jeanne these cards are devine.... love the simplicity
Post a Comment